
Due to limited funds and lengthy timescales, businesses resorted to outsourcing mobile app development for a while. However, many small businesses are creating mobile apps internally with practical development platforms and software tools that handle much of the preliminary work.
As a result, many businesses see the value of developing mobile apps for internal or client use. While the process of creating an app for the first time might be intimidating, it can also be immensely gratifying. To assist you in creating a successful app, this thorough blog will walk you through the whole app development life cycle.
8 Steps to Create A Successful App
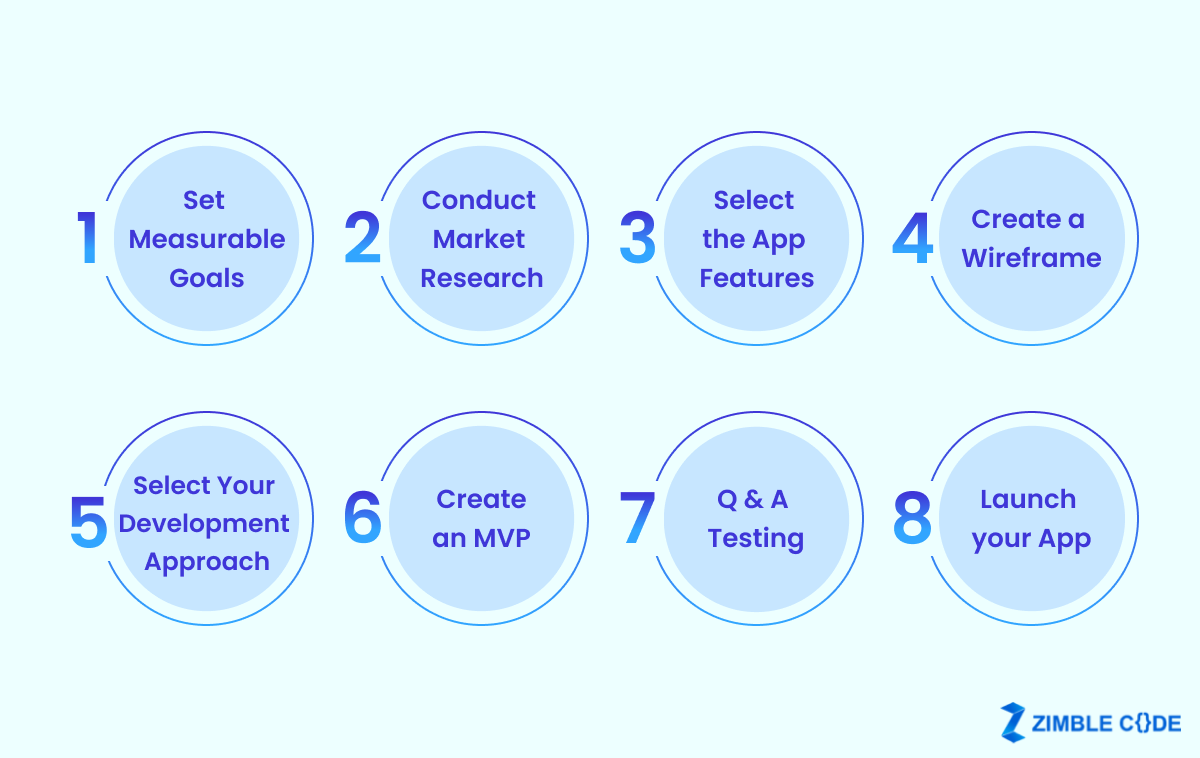
Step 1: Set Measurable Goals
You must start by setting up well-defined goals before hiring an on-demand app development company in California. Refer to questions: What do you hope to accomplish? What issues are you attempting to address with your app solution? It is because your business objective will ultimately determine your whole growth process. You can choose objectives related to your business or the end users you want to serve. However, keep in mind that every objective should have distinct key performance indicators (KPIs). So, make sure you have pre-determined success metrics in place.
Step 2: Conduct Market Research
Once your objectives are clear, you must confirm that the market needs your app. With conducting market research, developing an app might be a good use of your time, money, and resources. You can:
- Create surveys,
- Conduct interviews
- Connect with focus groups
- Study your competition
Further, if the app is for a brand-new concept, you’ll need to get in touch with potential customers who fall inside your target market.
Step 3: Select the App Features
Many people are tempted to include supplemental and superfluous features in an app. However, some features need to be added to the main objective of your app. Furthermore, each additional feature raises the price and length of the development process. So, you must carefully analyze and select the features for your app which deliver the best user experience and increase customer loyalty.

Step 4: Create a Wireframe
A wireframe is a basic mobile application layout that visually depicts the app’s functionality and layout. But take your time preparing one, as the components of an app’s design in a wireframe are unimportant. This tool only partially represents what the finished app will look like. Your wireframe should instead emphasize structure and flow. It must be regarding your vision for how the app will operate for the development team to understand.
Step 5: Select Your Development Approach
There are many approaches to app development, from adopting a no-code app builder to outsourcing software development. So, choosing the best approach for your particular circumstance is essential before developing an app. The best technique to choose involves considering several variables, including your budget, technical proficiency level, app kind, and time to market.
Step 6: Create an MVP
You should always create an MVP—minimum viable product—as you begin making the software. An MVP’s main benefit is that it pushes you to consider your app’s most crucial features. This is a vital component of the app project that must be regarded if success is to be achieved. Consider what is indeed required for your app to run. Build those features first and then focus on the others. Keep in mind that an MVP is more than simply a test app.
Step 7: QA Testing
You must test your app on actual mobile platforms when your MVP is complete and usable. Your app can be used in a wide variety of ways. Thus, the quality assurance specialist must verify it in all areas. Therefore, don’t just test the app on your phone once and assume it is functionally sound. You may ask a quality assurance professional for assistance in detecting issues with your app before it is released to the public. If we don’t recognize these immediately, consumers will eventually uncover them in the real world.
Step 8: Launch your App
Once everything is done, it is time to launch your software and put it in consumers’ hands. Uptime and visibility must be your current main priorities. Ensure the program is entirely user-friendly with zero bugs before launching it over Apple App Store and the Google Play Store. Additionally, both of these app platforms have different requirements for applications. Therefore, before you go through this process, you must understand all the different submission guidelines.
Final Thoughts
It takes time and expertise to create an app. Several things need to be considered. Once you have decided to build an app, you should first consider the design of the app, which necessitates some crucial decisions. Depending on your resources and business requirements, you can further hire an app development company in California that can assist you in creating the app to help your business thrive better in this highly competitive market.
Read Also – 12 Trends of Mobile App Development in 2023

Frequently Asked Questions (FAQs)
Q1. How much time does it take to create a mobile application?
A smaller-sized smartphone app typically takes one to two months to build. The length of time required increases with the size and complexity of the app design. Larger, more complicated mobile apps should take three to six months to build, according to app developers.
Q2. Can a mobile app be modified after it has been released?
Yes, you may include updates to repair minor software flaws and enhance any app features that may have outgrown their usefulness since your app’s release.
Q3. Can your mobile app be used to accept payments?
You may allow users to make in-app purchases and accept payments via an app. If you’ve already created the app, consider integrating mobile payment capabilities.


Useful blog! Very informative tips.